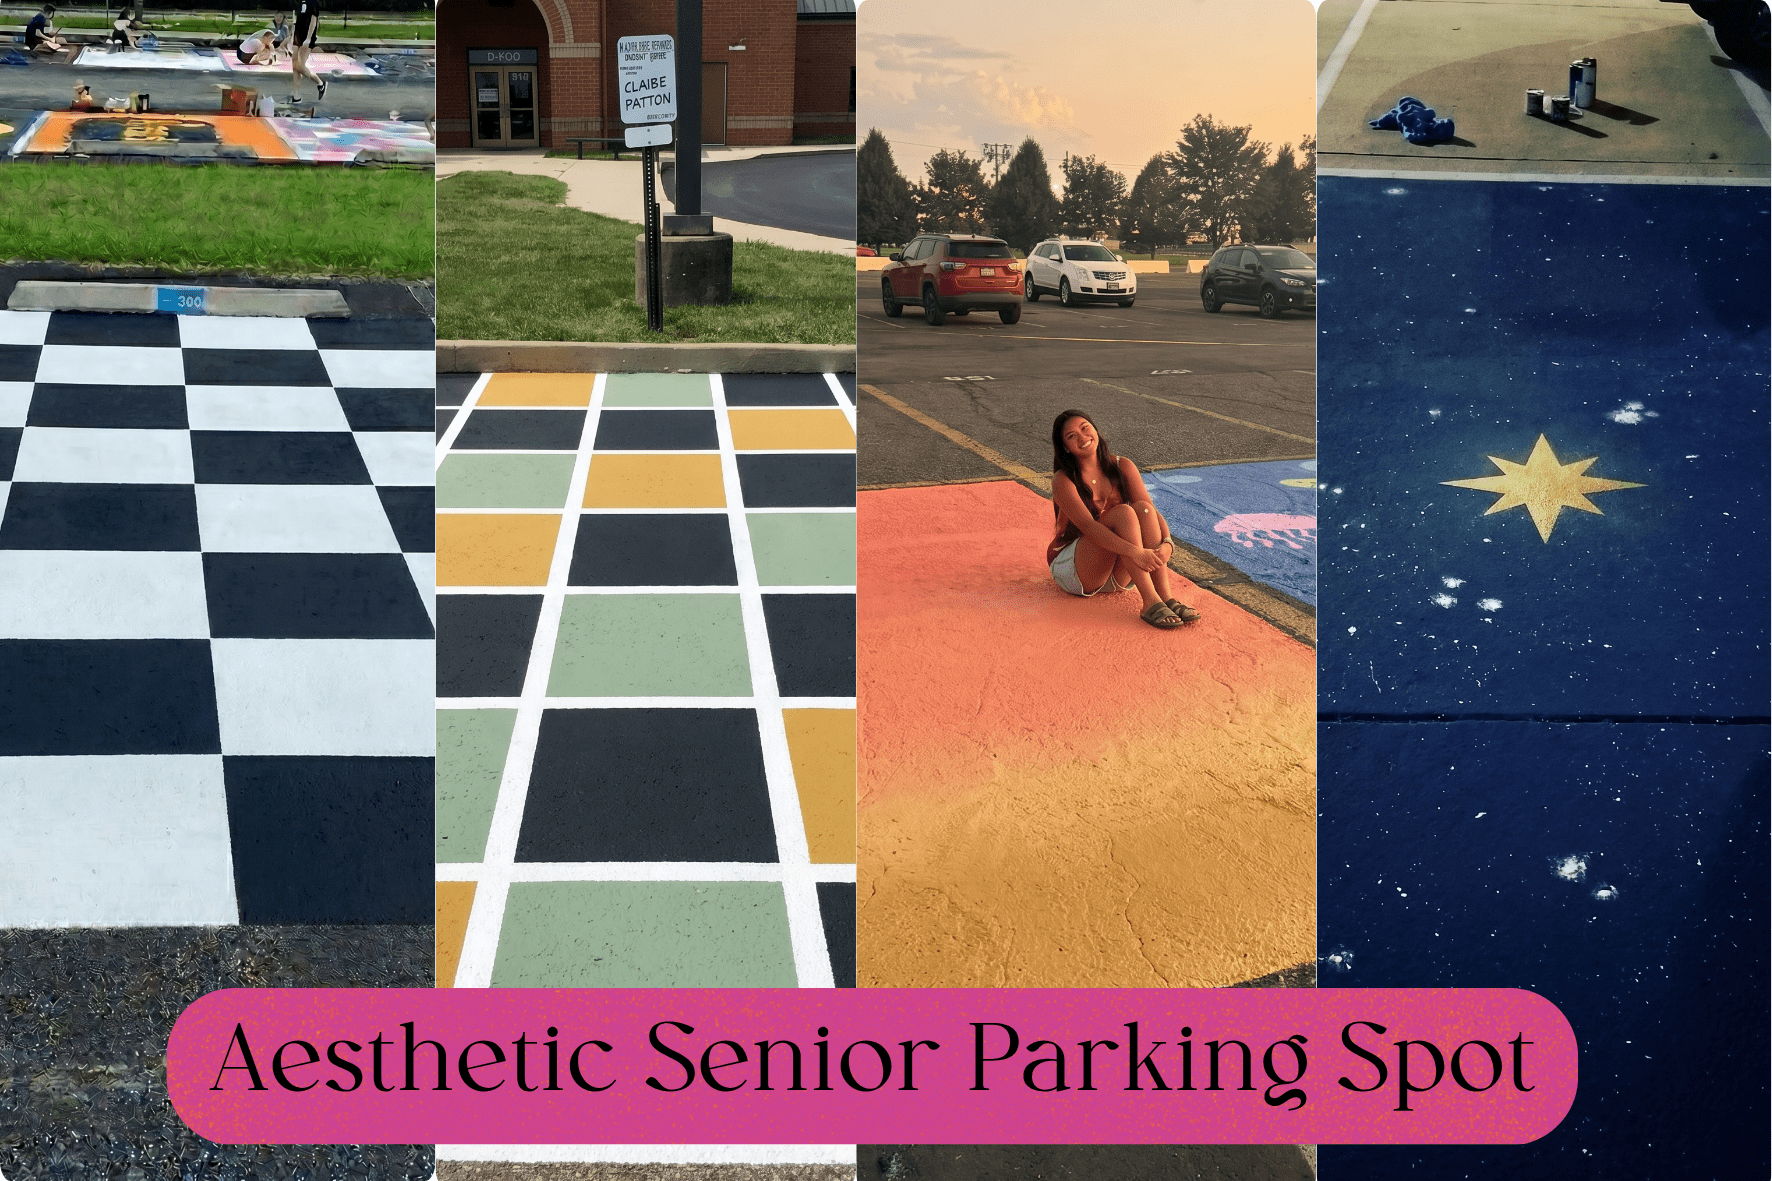
Not every senior is born with a paintbrush in hand, and that is completely okay. The whole point of creating an aesthetic senior parking spot is to express you, not to prove you belong in an art class. The most eye-catching aesthetic senior parking spots on campus are almost always the simplest ones. A clean checkerboard, bold block letters, a geometric grid. These designs photograph beautifully, dry evenly, and take a fraction of the effort a detailed mural would.
This guide is written specifically for you. Every idea below is doable in one day, needs fewer than five materials, and will make your aesthetic senior parking spot look like it belongs on Pinterest. Simple does not mean boring. Simple means smart. Let’s dive in.
Before You Pick Up a Paintbrush: What You Need to Know First
Before you start on your aesthetic senior parking spot, check your school’s guidelines first. Most schools have a list of approved colors, size limits, and a designated painting weekend. Skipping this step can mean your beautiful spot gets painted over. Grab the rulebook early, confirm your spot dimensions, and note whether a clear sealant coat is allowed. It usually is, and it makes a huge difference in how long your design holds up against rain, sun, and tire marks.
Pick your painting day wisely too. You want dry weather with no rain in the forecast for at least 24 hours, and a cool morning rather than peak afternoon heat. Paint on hot asphalt dries too fast and can crack or look streaky. Show up early, lay out all your materials, and give yourself the whole day without rushing. A relaxed painter makes a much better-looking aesthetic senior parking spot every single time.
10 Aesthetic Senior Parking Spot Ideas Perfect for Non-Artists
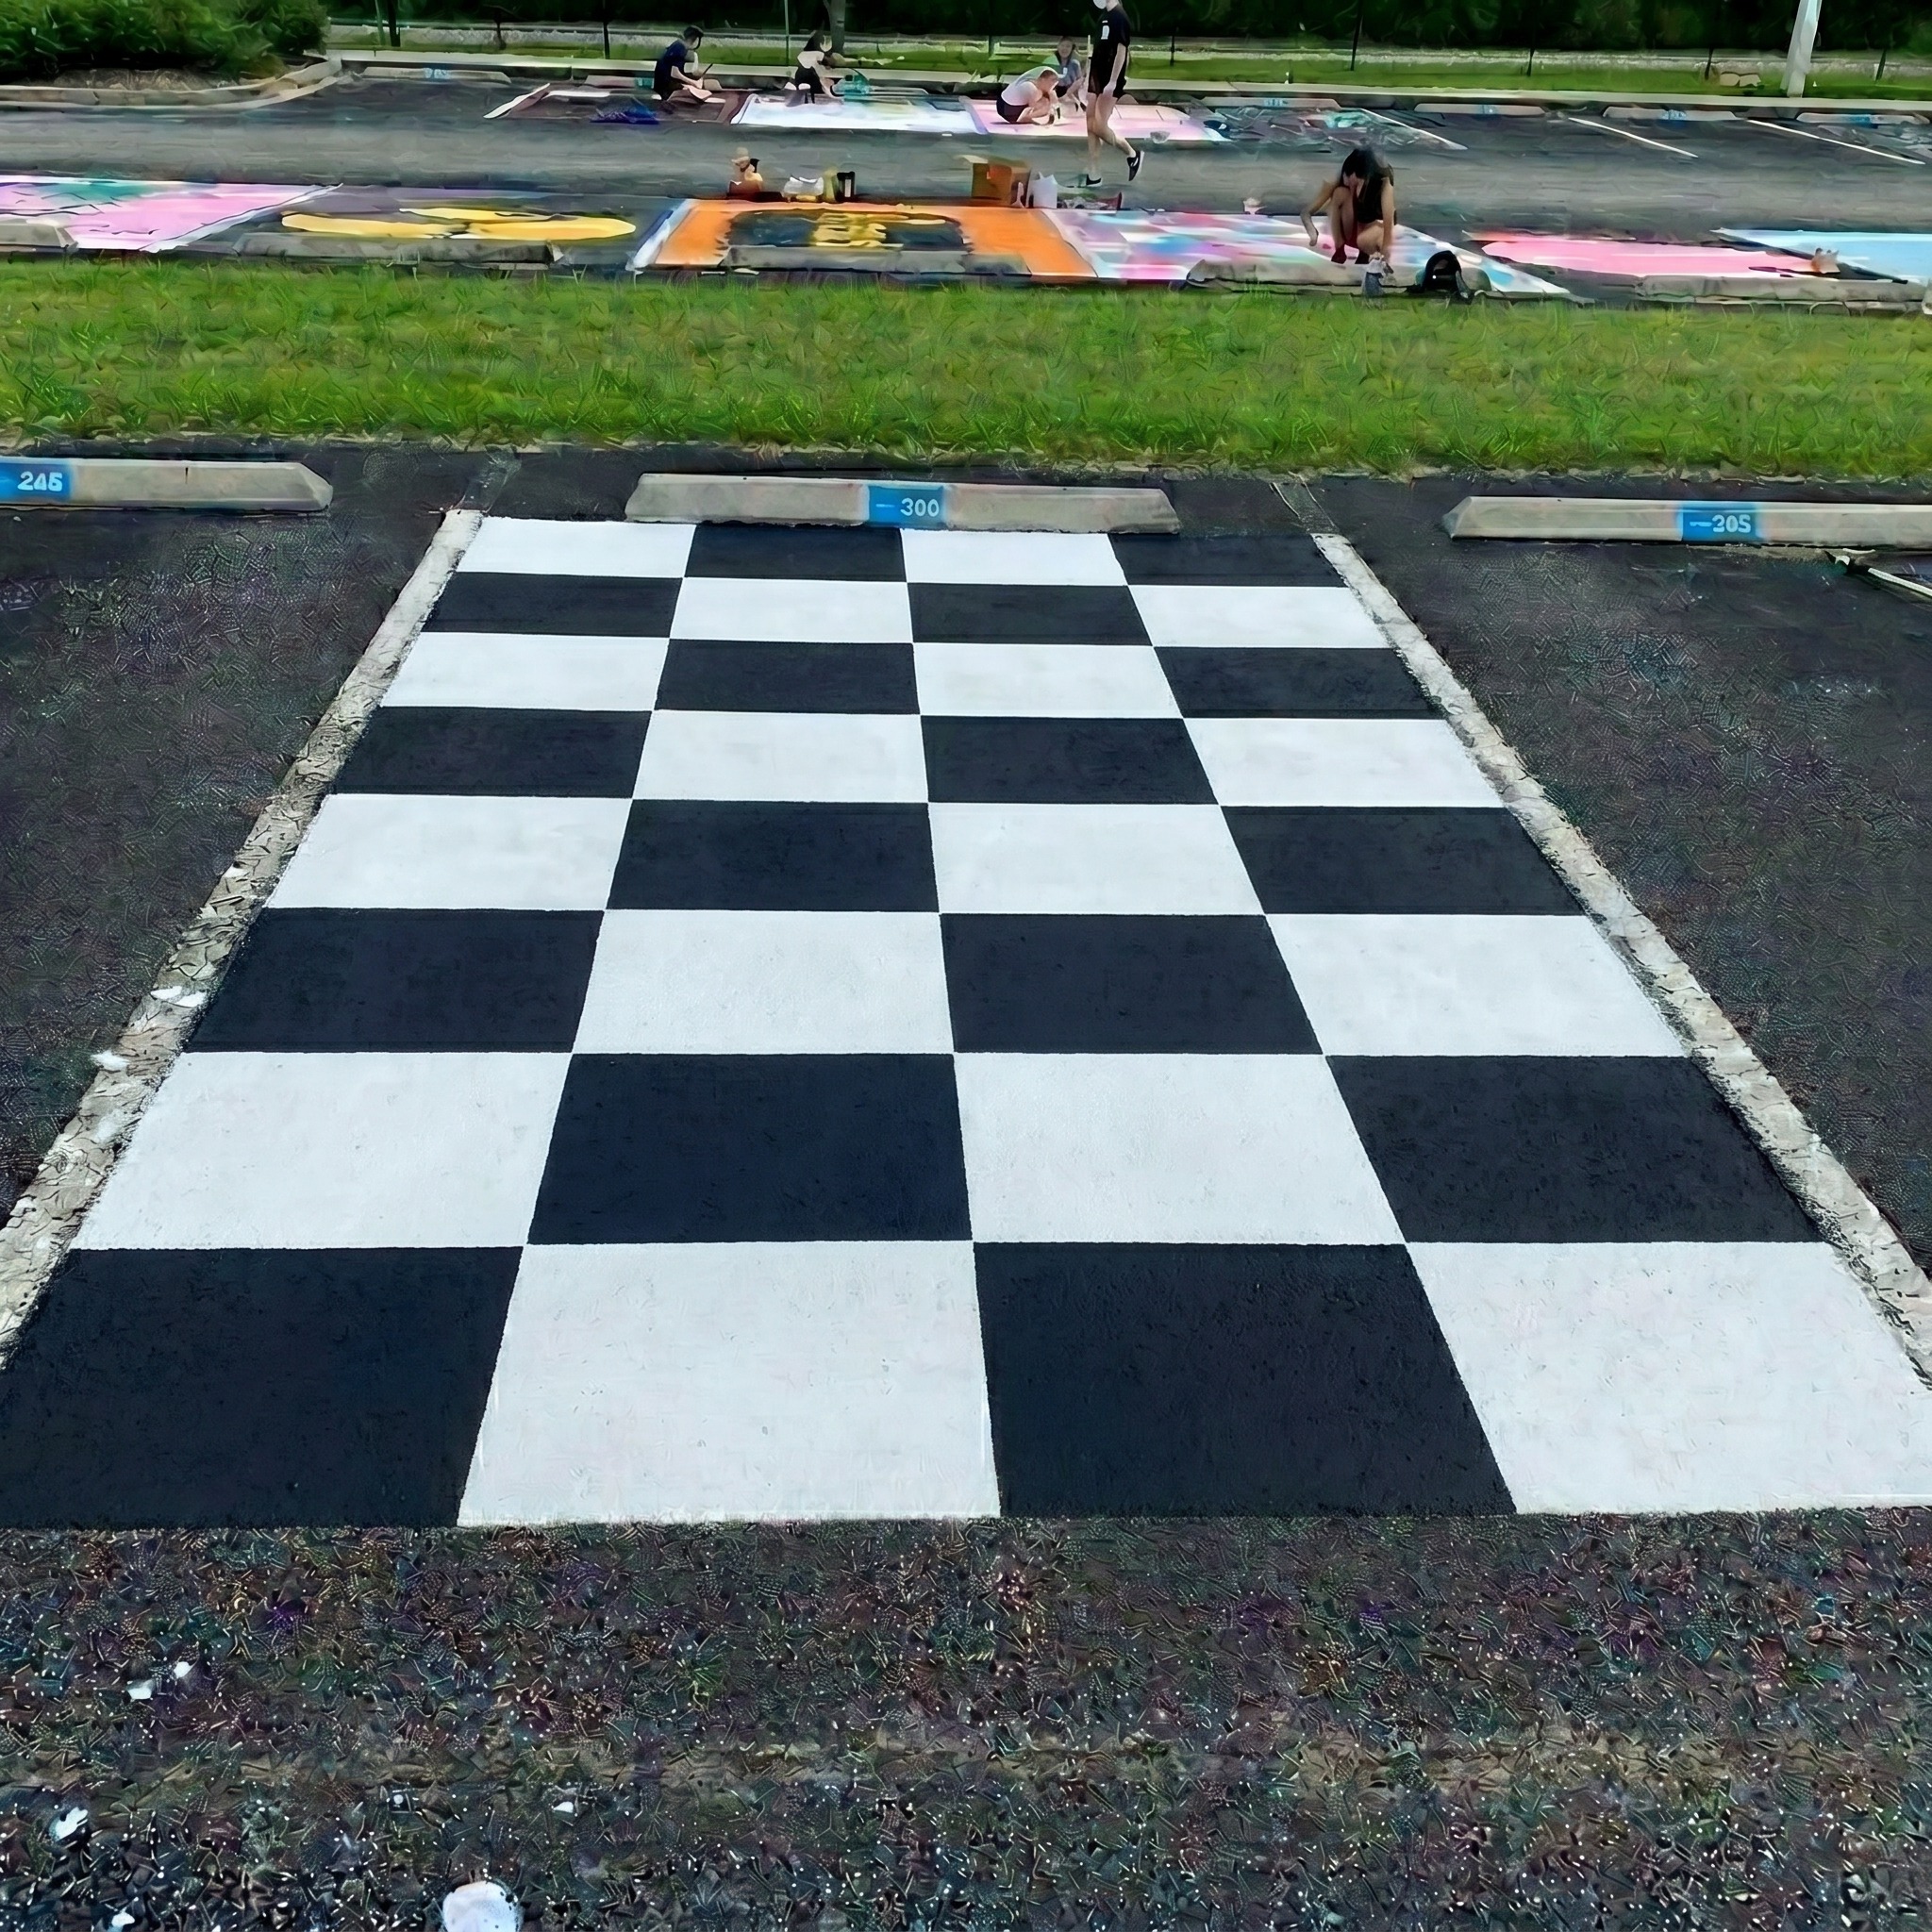
1. Checkerboard Classic
The checkerboard is the ultimate beginner design for an aesthetic senior parking spot, and it never goes out of style. All you need is painter’s tape, two paint colors, and a steady hand. The tape does 90% of the work for you. Peel it off and you have crisp, perfect squares every single time.
Materials needed: Painter’s tape, 2 cans of exterior latex paint, foam roller, measuring tape.
Beginner tip: Use your measuring tape to mark equal squares (6–8 inches works great) with chalk first, then apply tape along the chalk lines. Paint every other square, let dry, then do the remaining squares.
2. Bold Name Block Letters
Your name. Giant. On the ground. That’s it, and it makes for an incredibly bold aesthetic senior parking spot. Block letters are easier than they look because you can use a stencil or cut out cardboard letter guides so there’s zero freehand drawing involved.
Materials needed: Cardboard or pre-cut letter stencils, exterior spray paint or latex paint, painter’s tape.
Beginner tip: Print your name in a thick block font from any free online stencil generator, scale it to size, cut it out of cardboard, and trace lightly with chalk before painting. No guesswork needed.
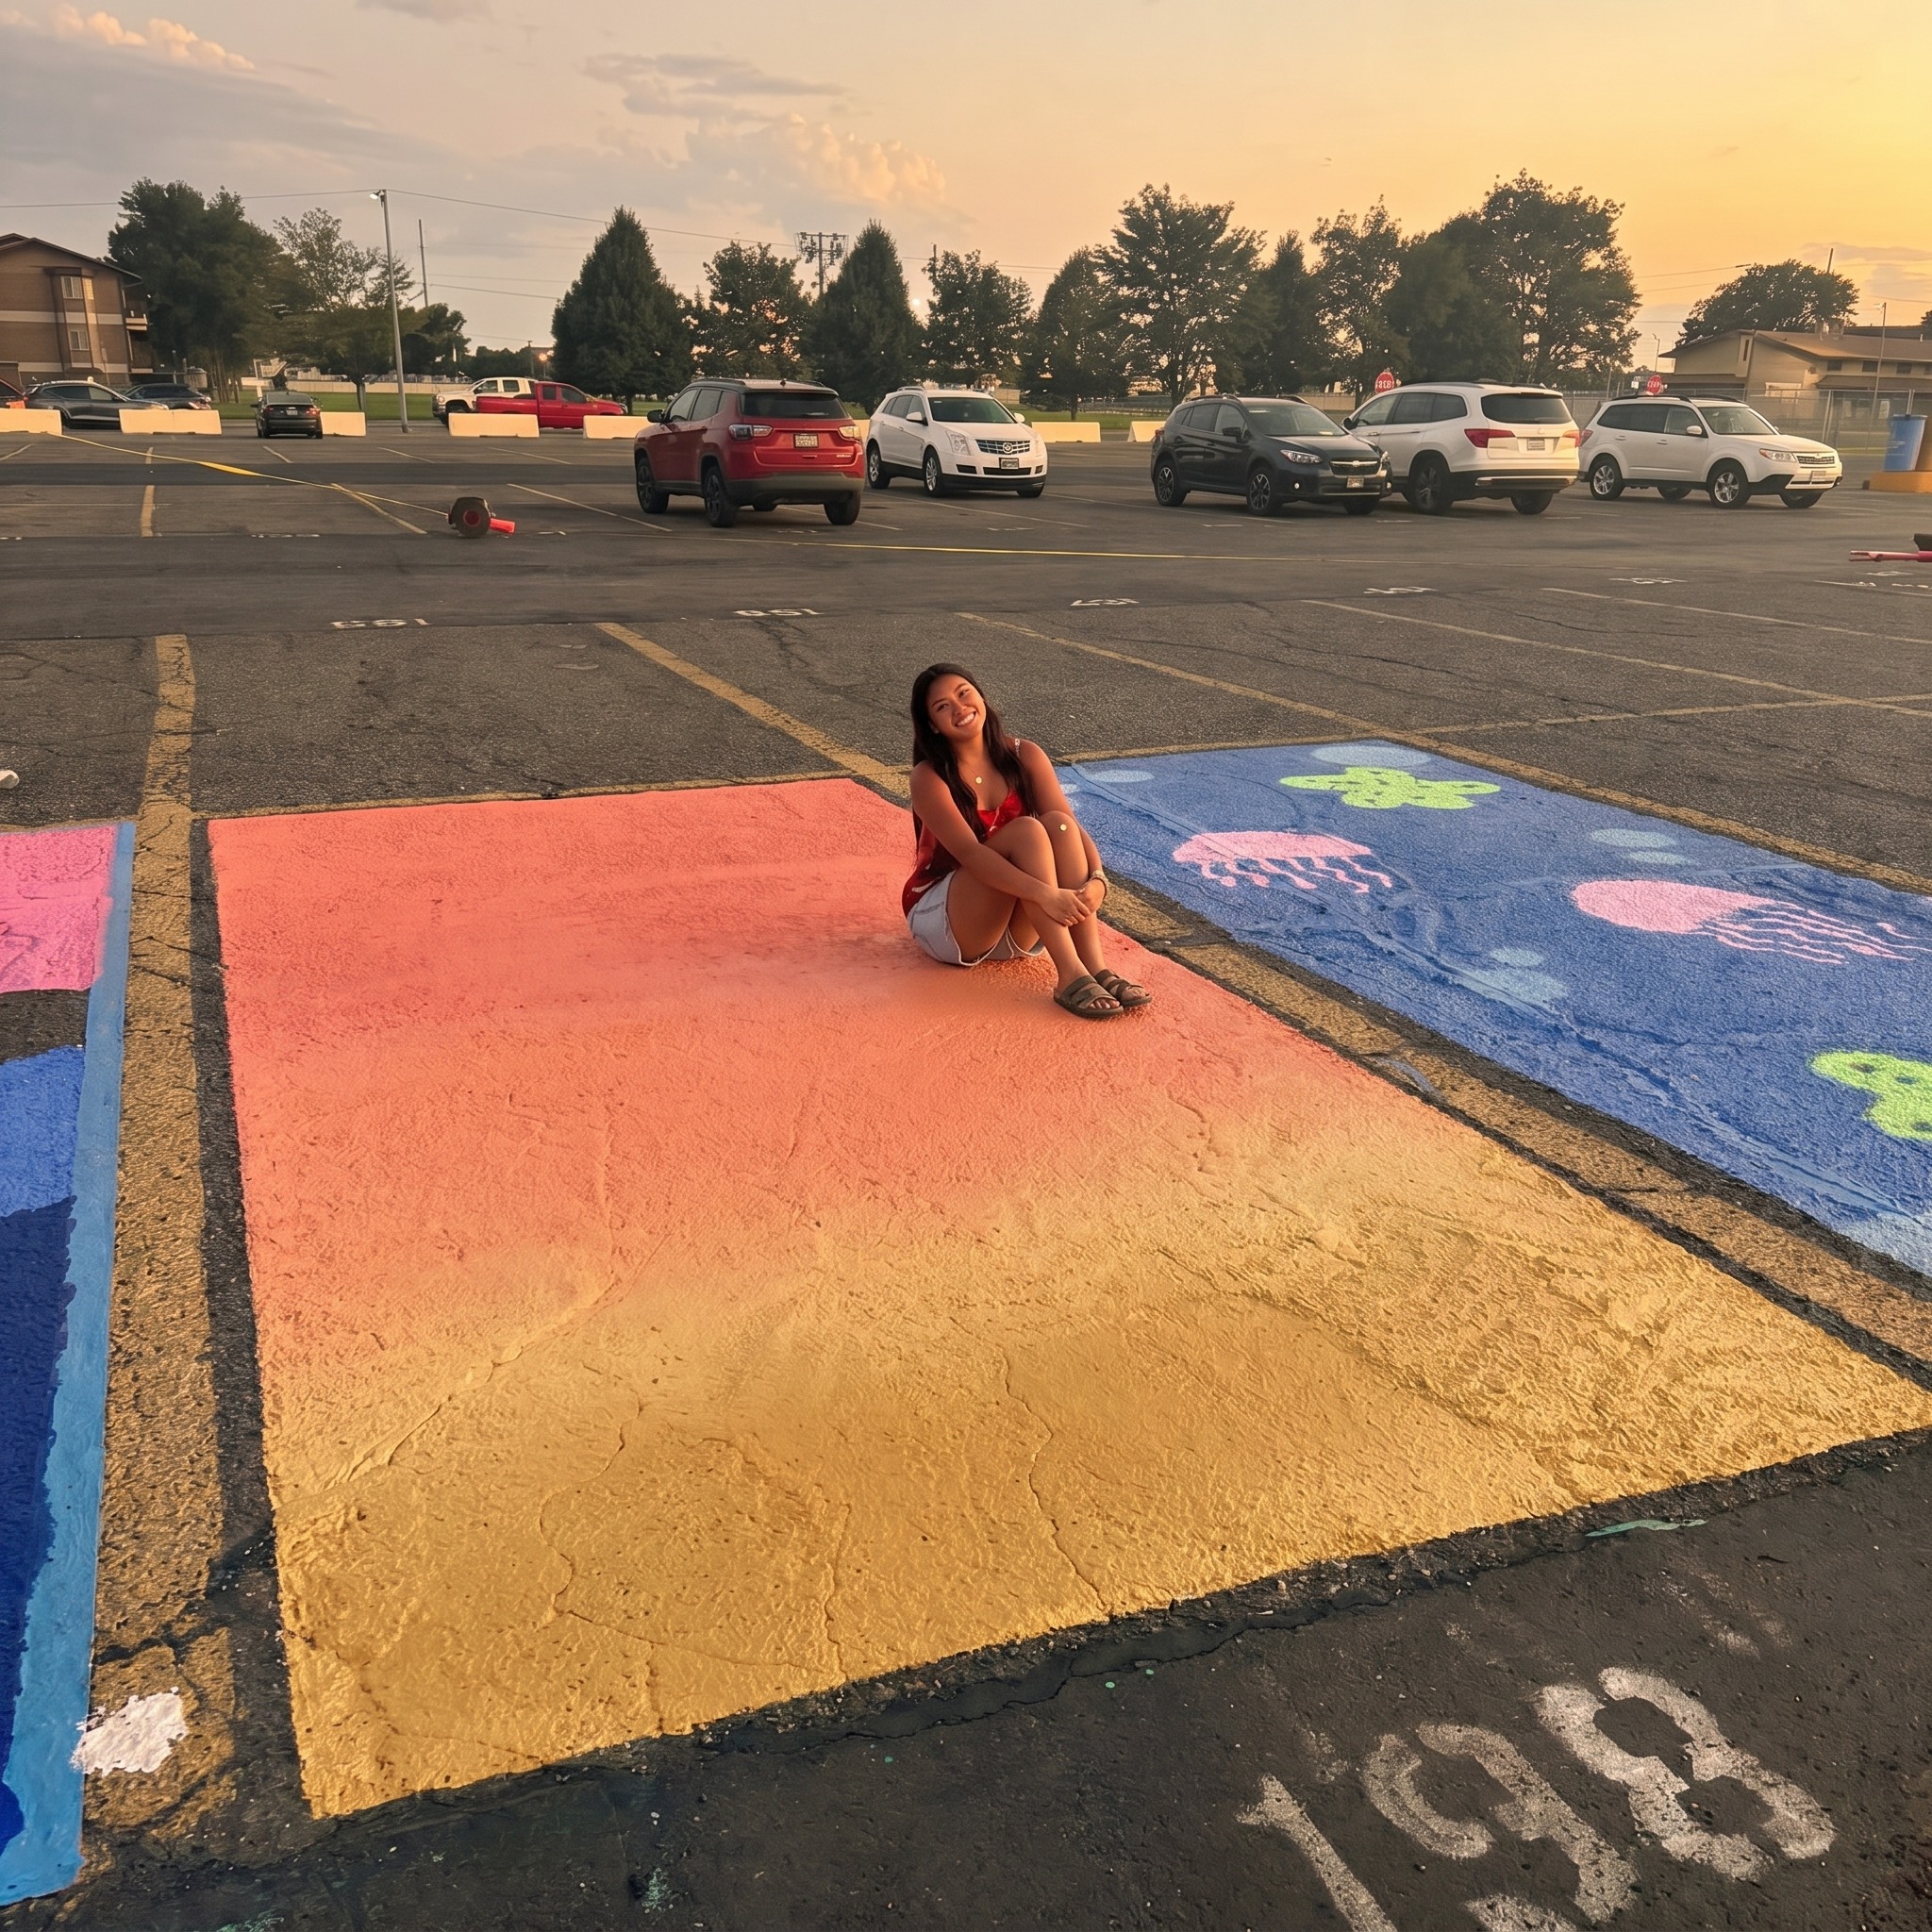
3. Solid Color Ombre Fade
The ombre fade is one of the most popular choices for an aesthetic senior parking spot because it looks complex but requires zero precision. Pick two colors you love. Maybe your school colors, or something totally your own. Then blend them from one side of the spot to the other. It sounds complicated but it’s just wet paint overlapped with a brush or roller. The imperfect blend is the whole point.
Materials needed: 2 cans of exterior latex paint in coordinating colors, wide paintbrush or foam roller.
Beginner tip: Paint color one across two-thirds of the spot, color two across the other two-thirds so they overlap in the middle, then blend quickly while both are still wet using a dry brush in short back-and-forth strokes.
4. Minimalist Geometric Grid
Draw a grid of thin lines and fill in select squares or rectangles with a single accent color, leaving the rest as bare asphalt. The contrast between the dark pavement and bright paint makes this look super modern and intentional, like something from a design magazine.
Materials needed: Painter’s tape, 1 can of accent color exterior paint, small foam brush.
Beginner tip: Use only painter’s tape to create all your lines. No drawing required. Press it down firmly to avoid paint bleeding underneath, and peel while the paint is still slightly tacky for the cleanest lines.
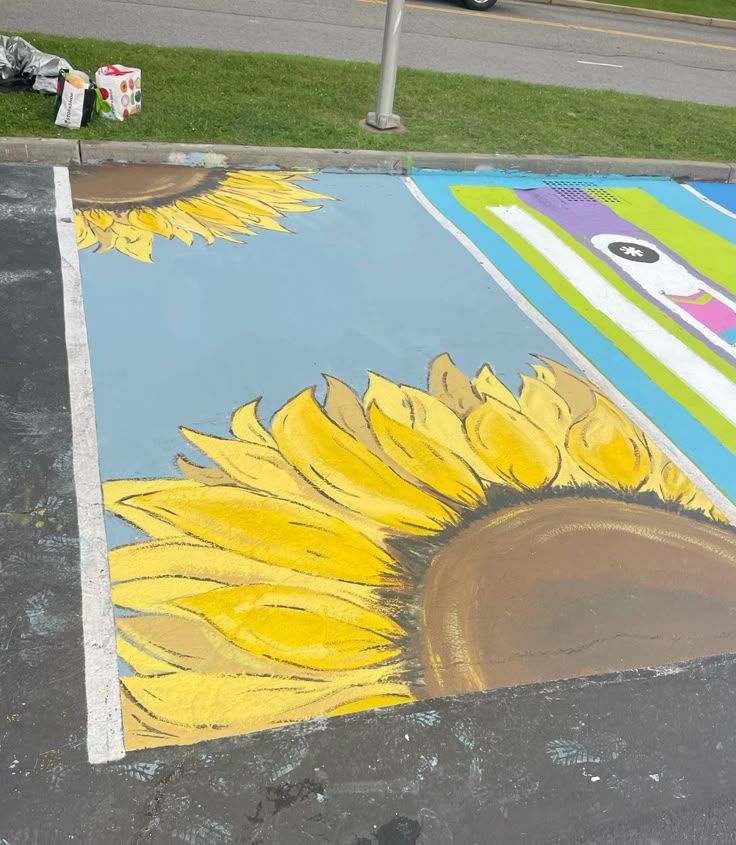
5. Sunflower Sunshine (Using Stencils)
A big bright sunflower sounds hard to paint, but with a stencil it’s one of the easiest designs on this list. You simply hold the stencil down, fill in the color, and lift. Repeat for each petal. Done. Your spot looks like something from a garden magazine.
Materials needed: Large flower stencil (from any craft store), yellow and brown exterior spray paint, painter’s tape to hold stencil in place.
Beginner tip: Spray paint in short, even bursts from about 10–12 inches away. Holding the can too close causes drips. Overlap petal layers slightly for a fuller flower.
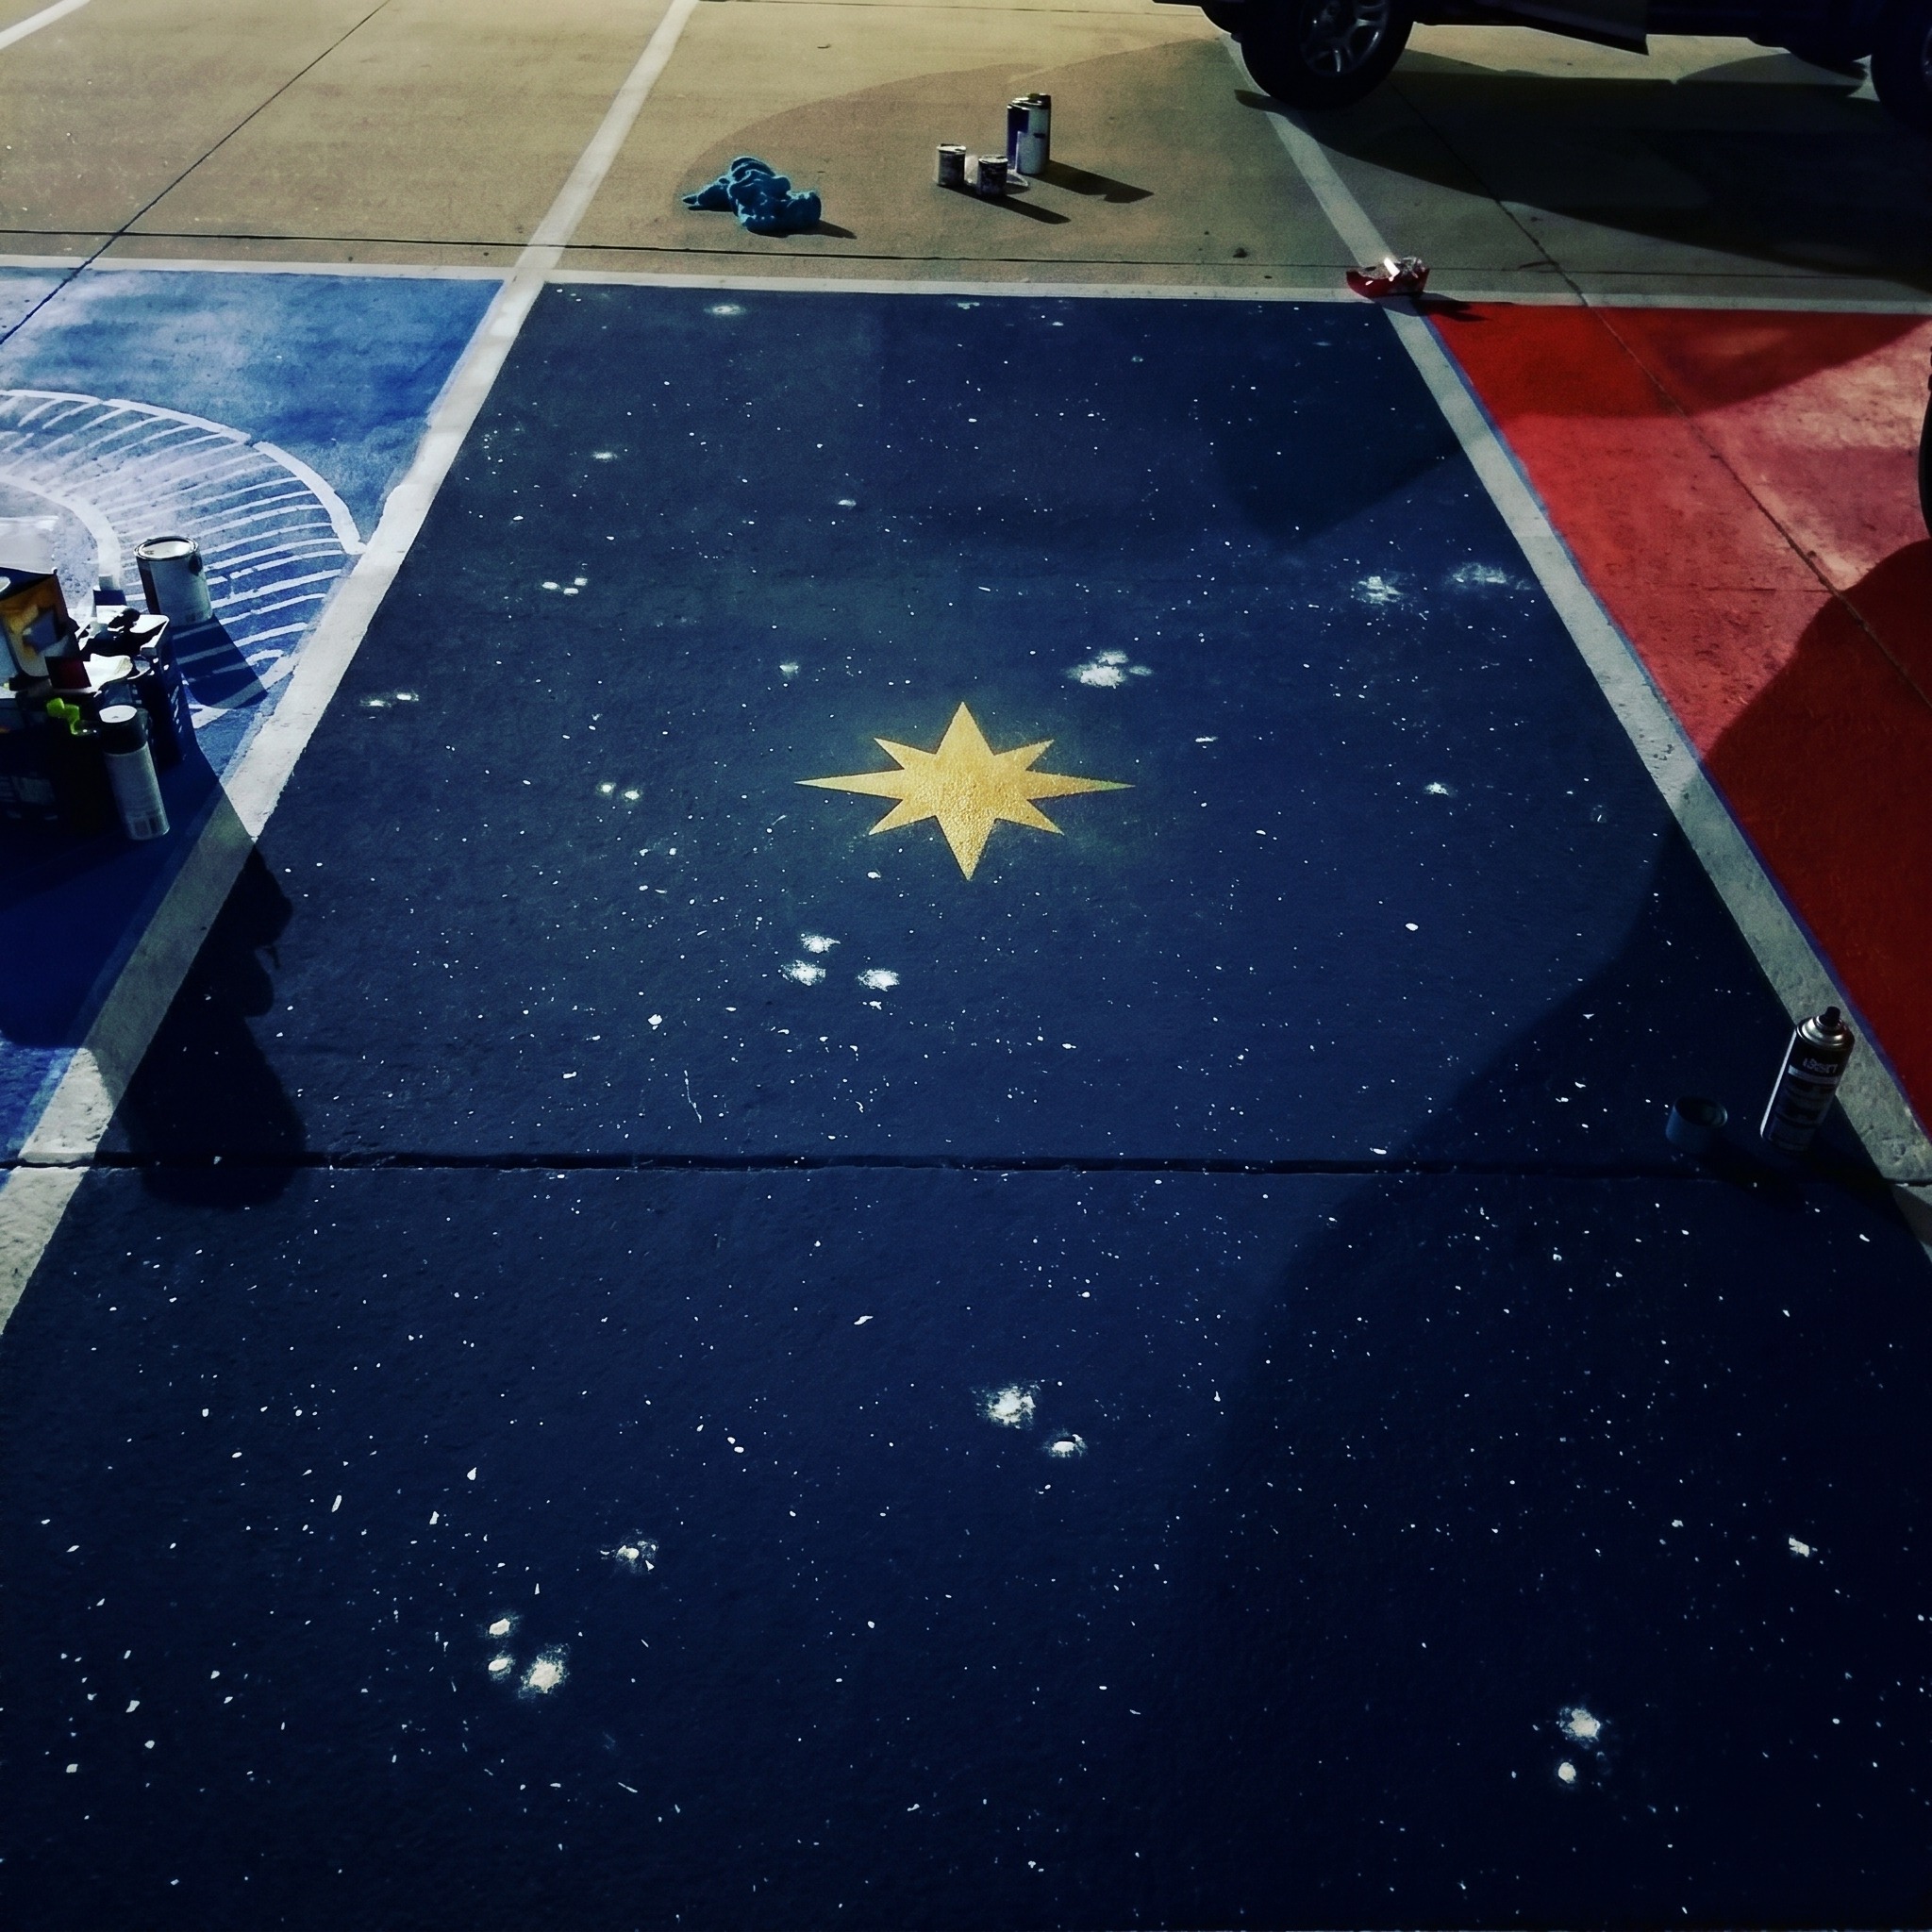
6. Star and Night Sky
A navy or dark blue base coat with a few scattered white dots and one big star. That’s literally it, and it looks absolutely magical at night when headlights hit it. The dots don’t have to be perfect because stars aren’t perfectly spaced in real life either.
Materials needed: Dark navy exterior paint, white exterior paint, foam roller, small round stencil or bottle cap for star dots.
Beginner tip: Once your base coat is fully dry, dip the flat end of a pencil eraser or a small bottle cap into white paint and press lightly to make dot “stars.” Use a larger star stencil for one focal point.
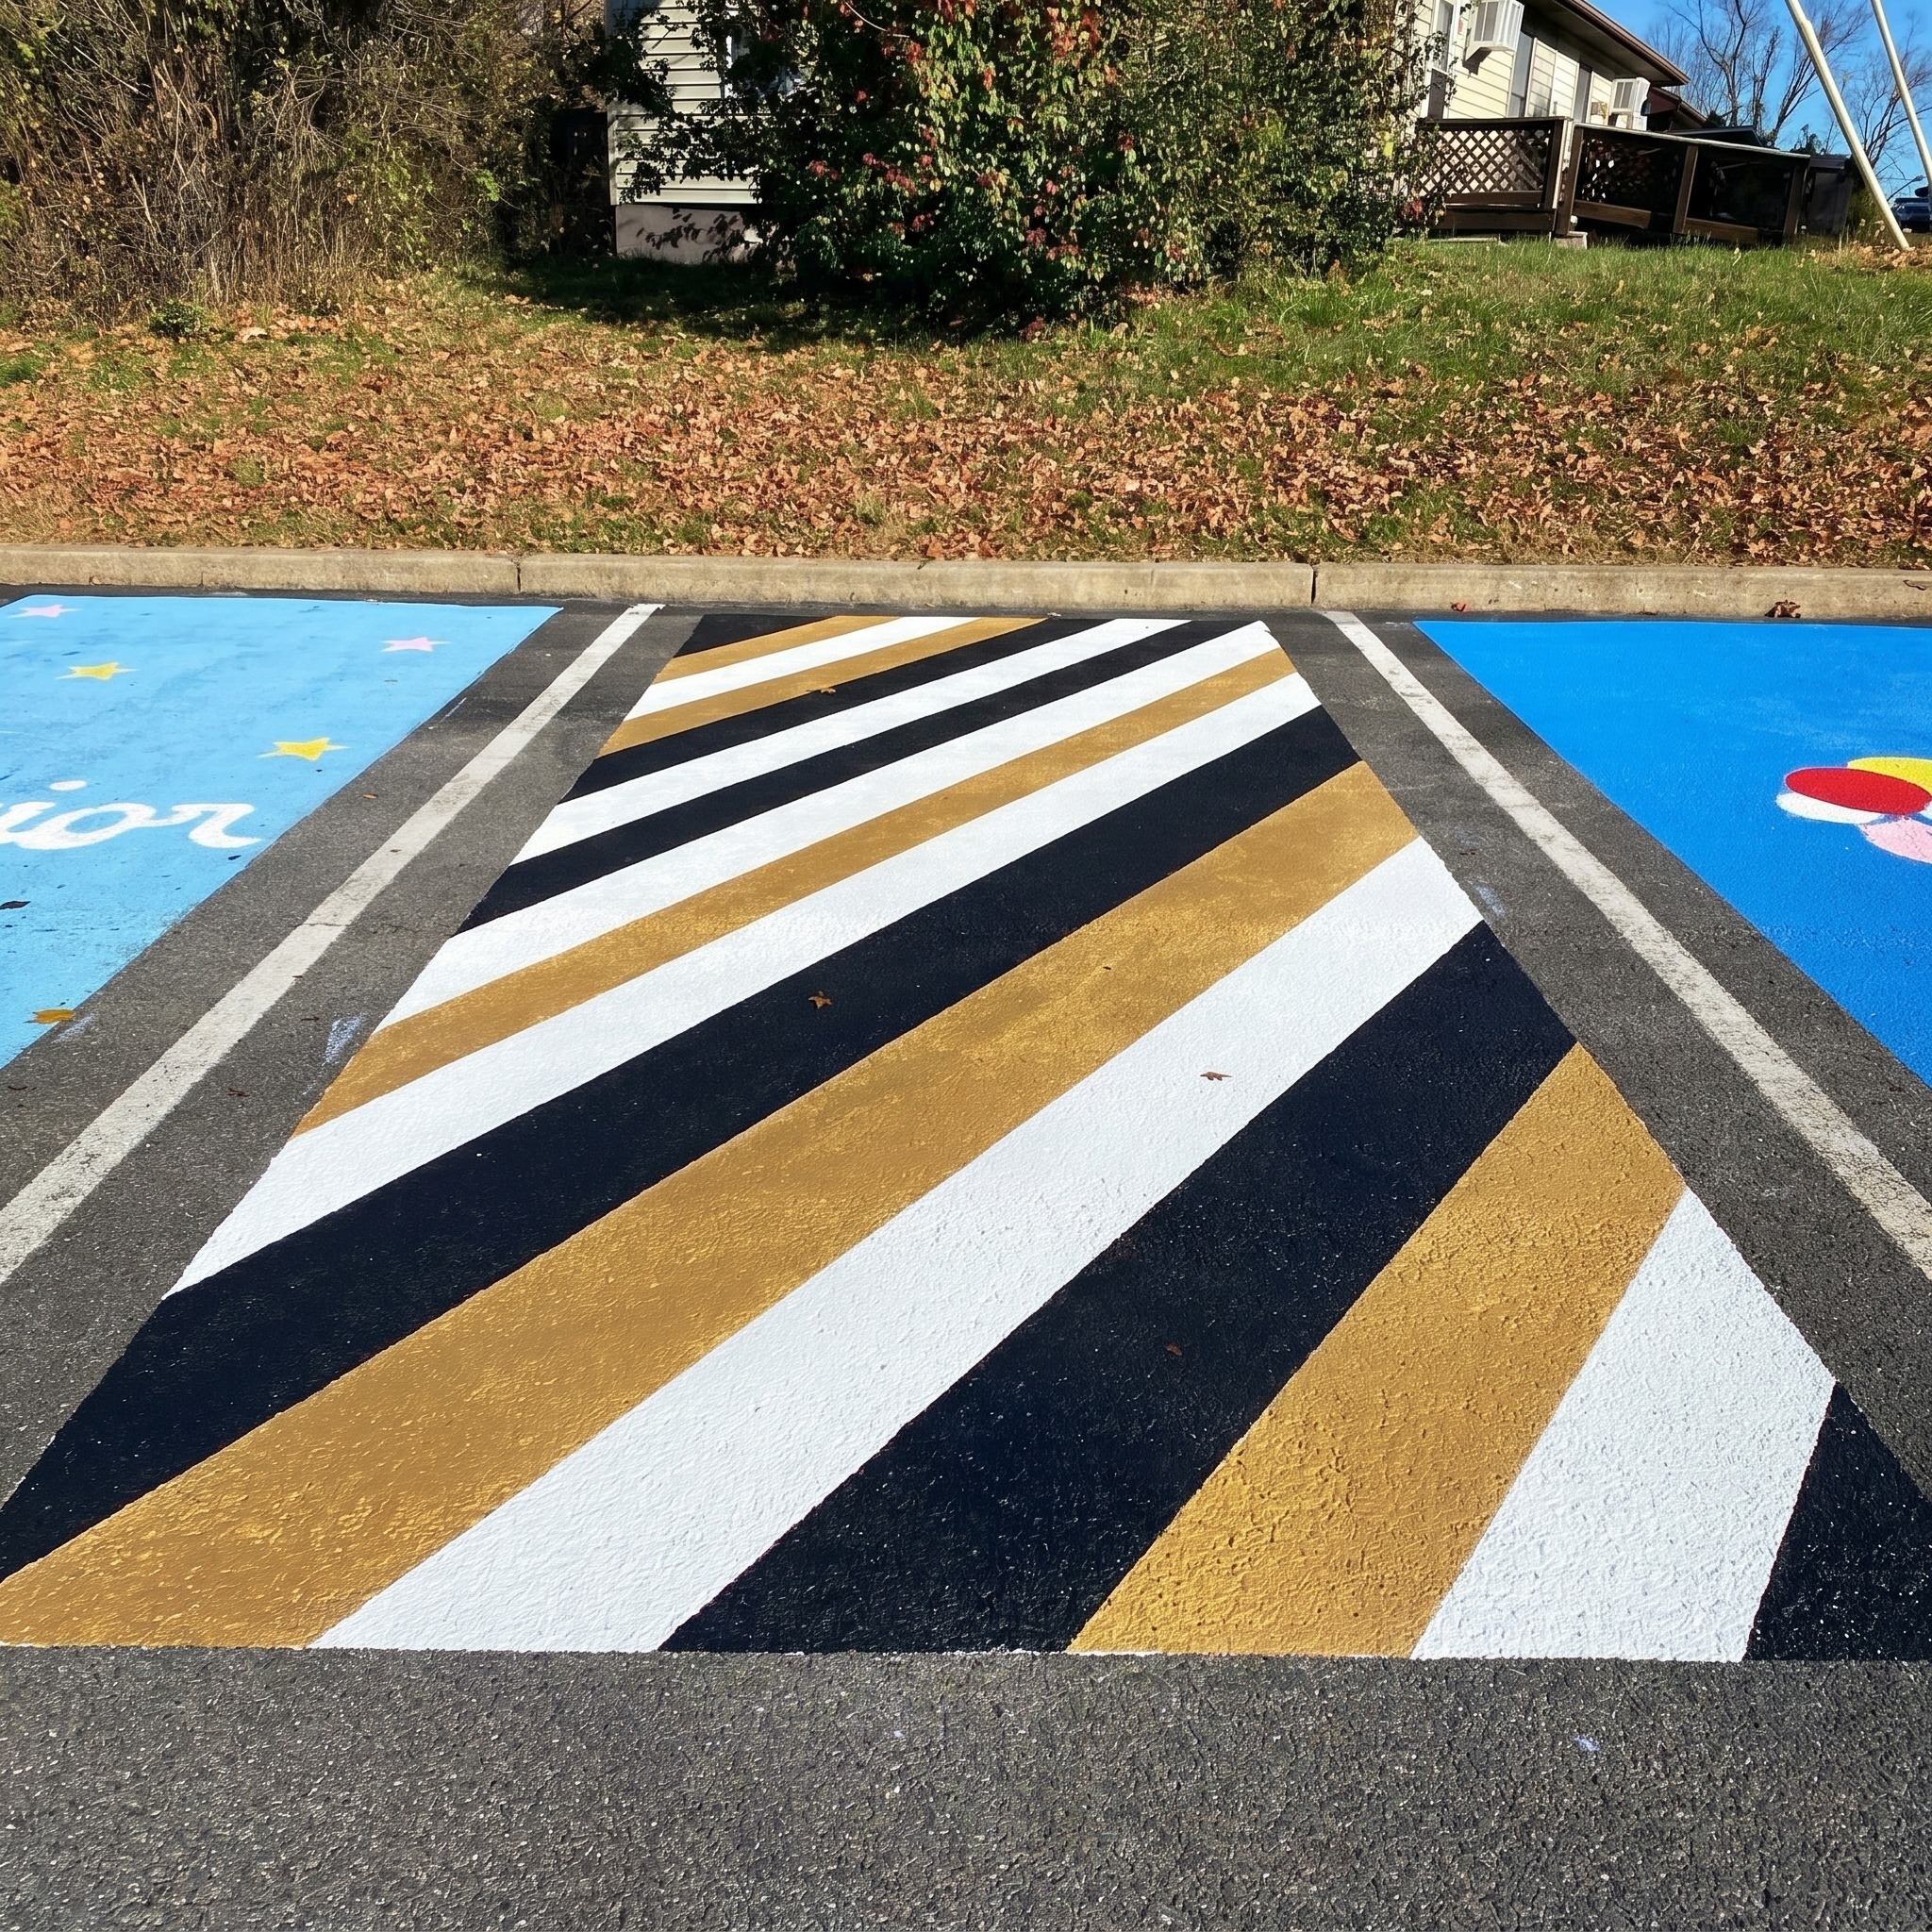
7. Diagonal Stripe Design
Diagonal stripes are one of the most visually dynamic patterns you can paint, and they’re made entirely with tape. Two or three colors alternating at a 45-degree angle creates massive visual impact for almost zero artistic effort.
Materials needed: Painter’s tape, 2–3 cans of exterior latex paint in complementary colors, foam roller.
Beginner tip: Mark your 45-degree angle with a chalk line first. Lay tape along the chalk marks, paint your stripes in one color, let dry, then add the next. Work one stripe at a time so colors don’t bleed together.
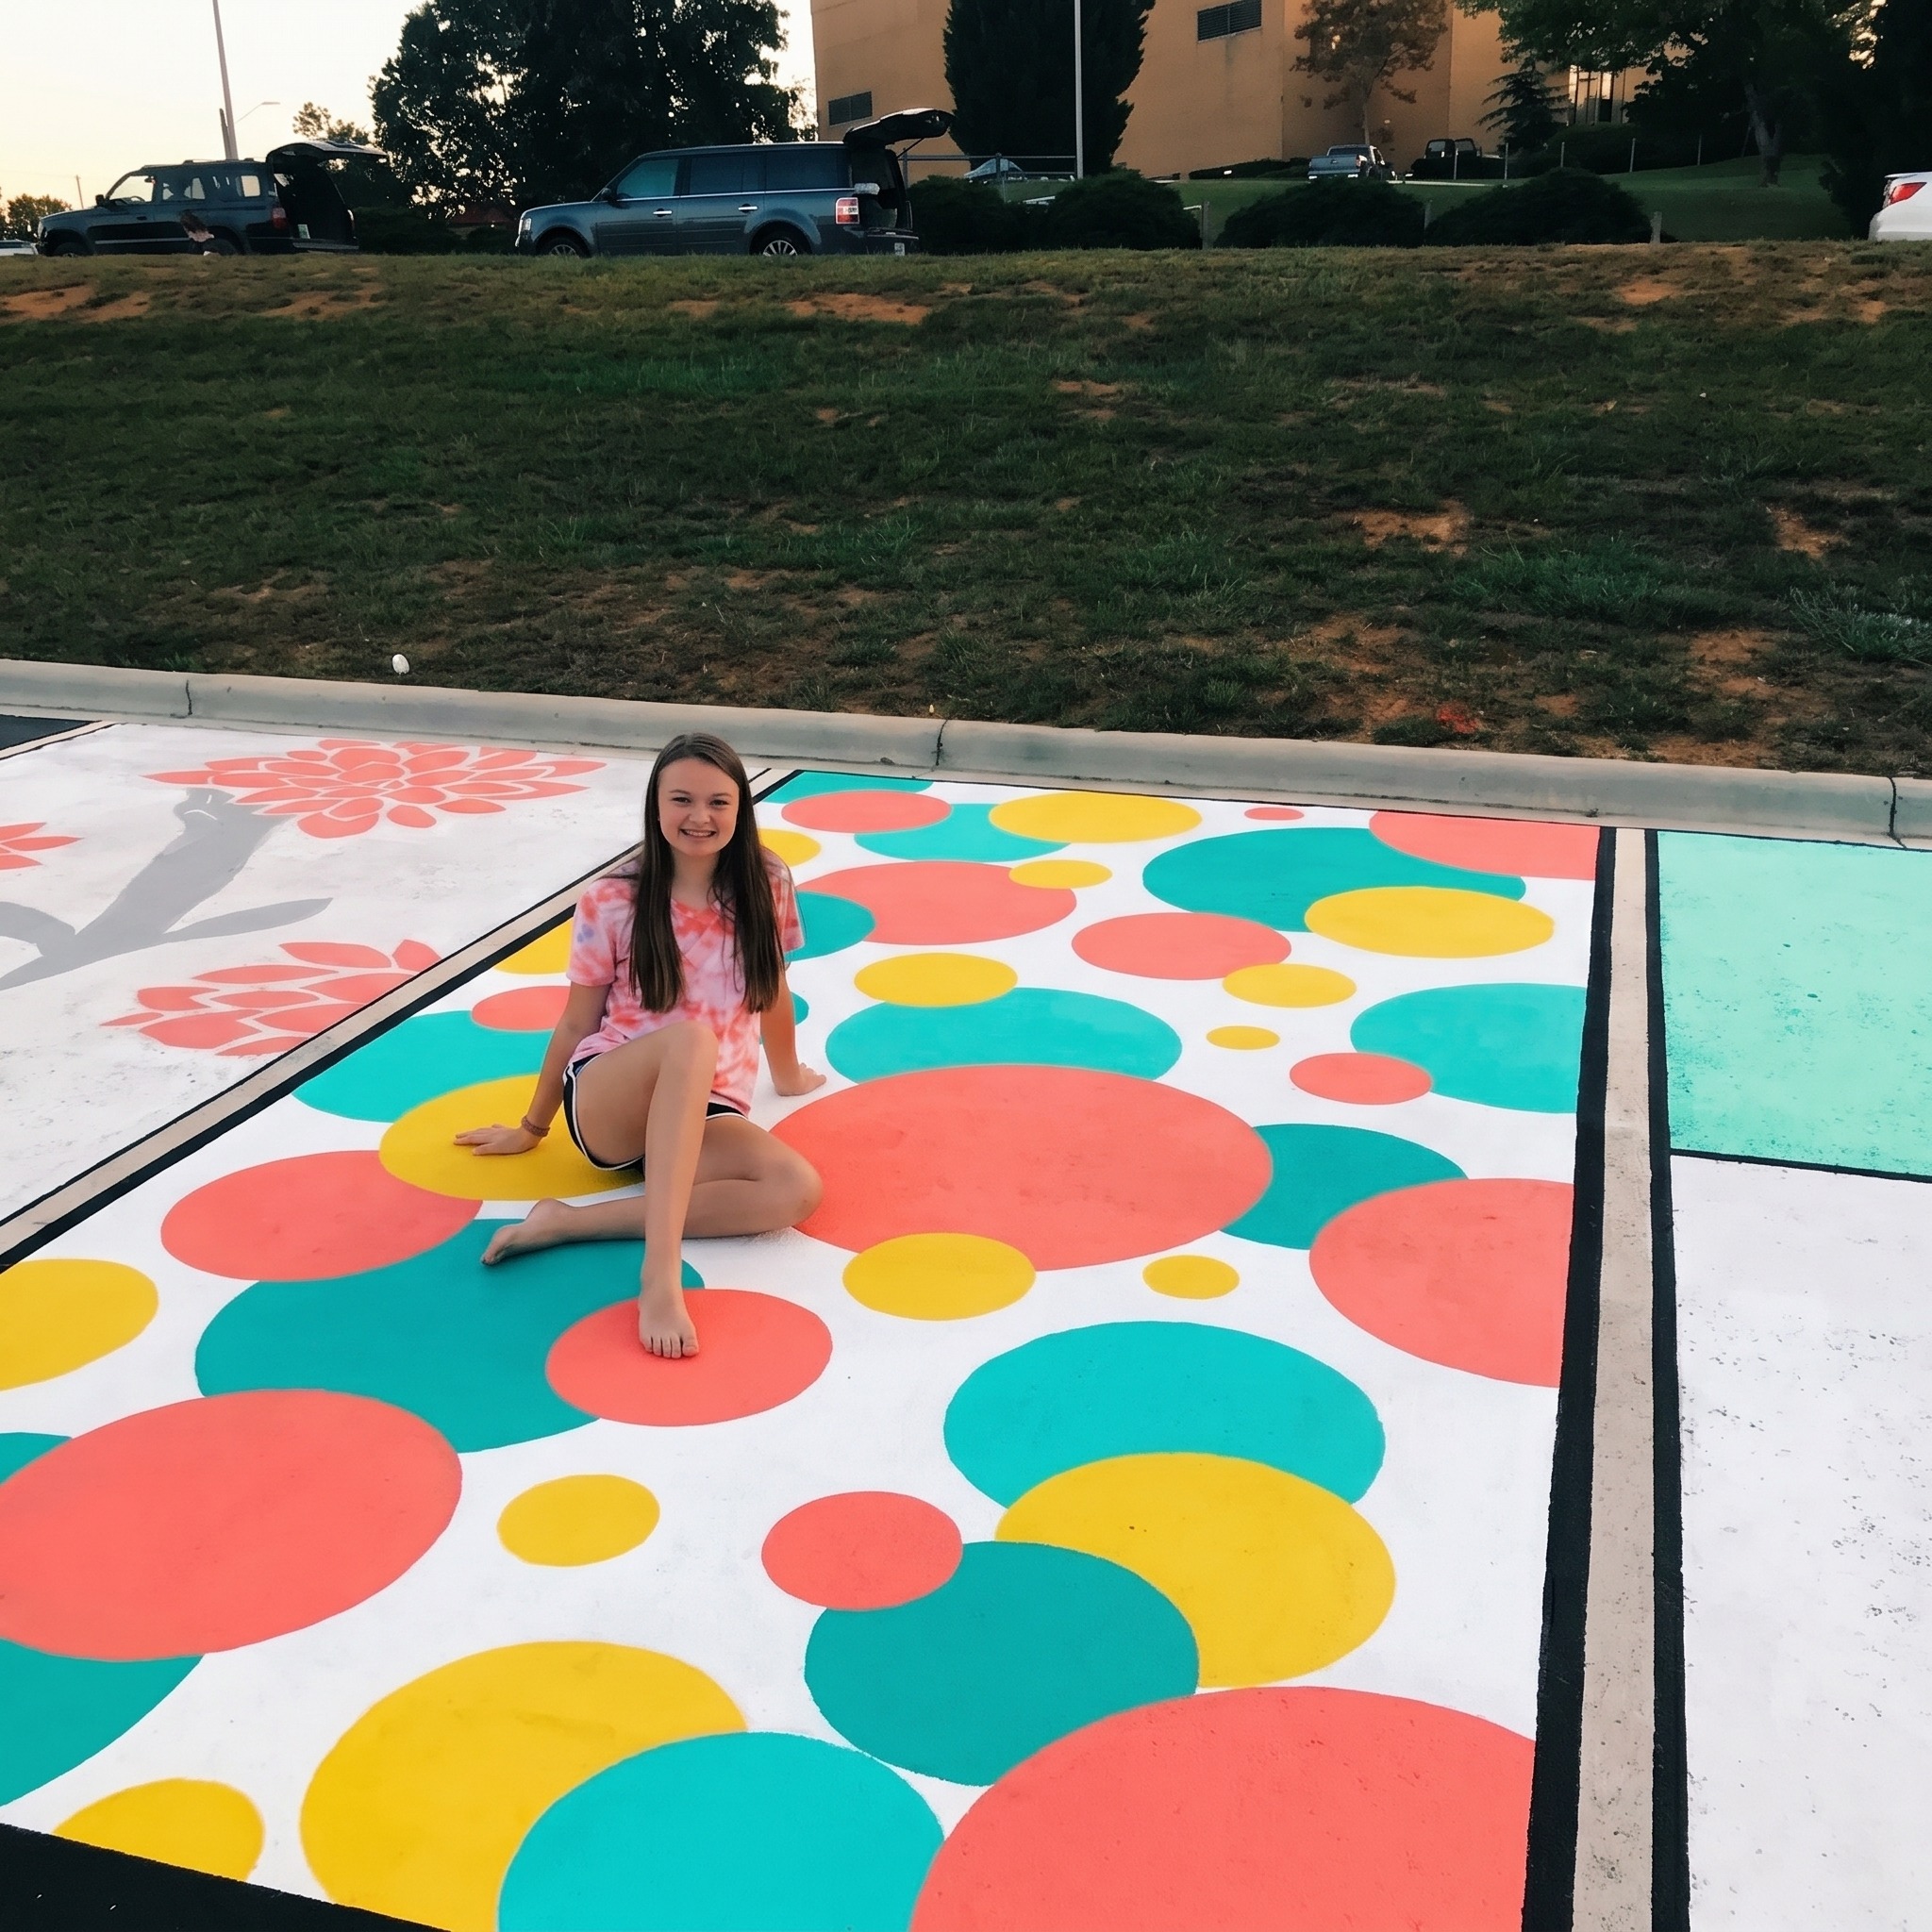
8. Polka Dot Pop Art
Big, colorful polka dots on a white base is pure joy in parking spot form. This idea is especially great if you’re going for a retro or fun, playful vibe. You just need circular stencils (cups, cans, or lids work perfectly) and a few bright colors.
Materials needed: White exterior paint, 3–4 bright accent paint colors, circular objects to trace (cups, jar lids), small foam brush.
Beginner tip: Trace your circle shapes with chalk first to plan the layout before committing to paint. Vary the dot sizes slightly for a more natural, playful look.
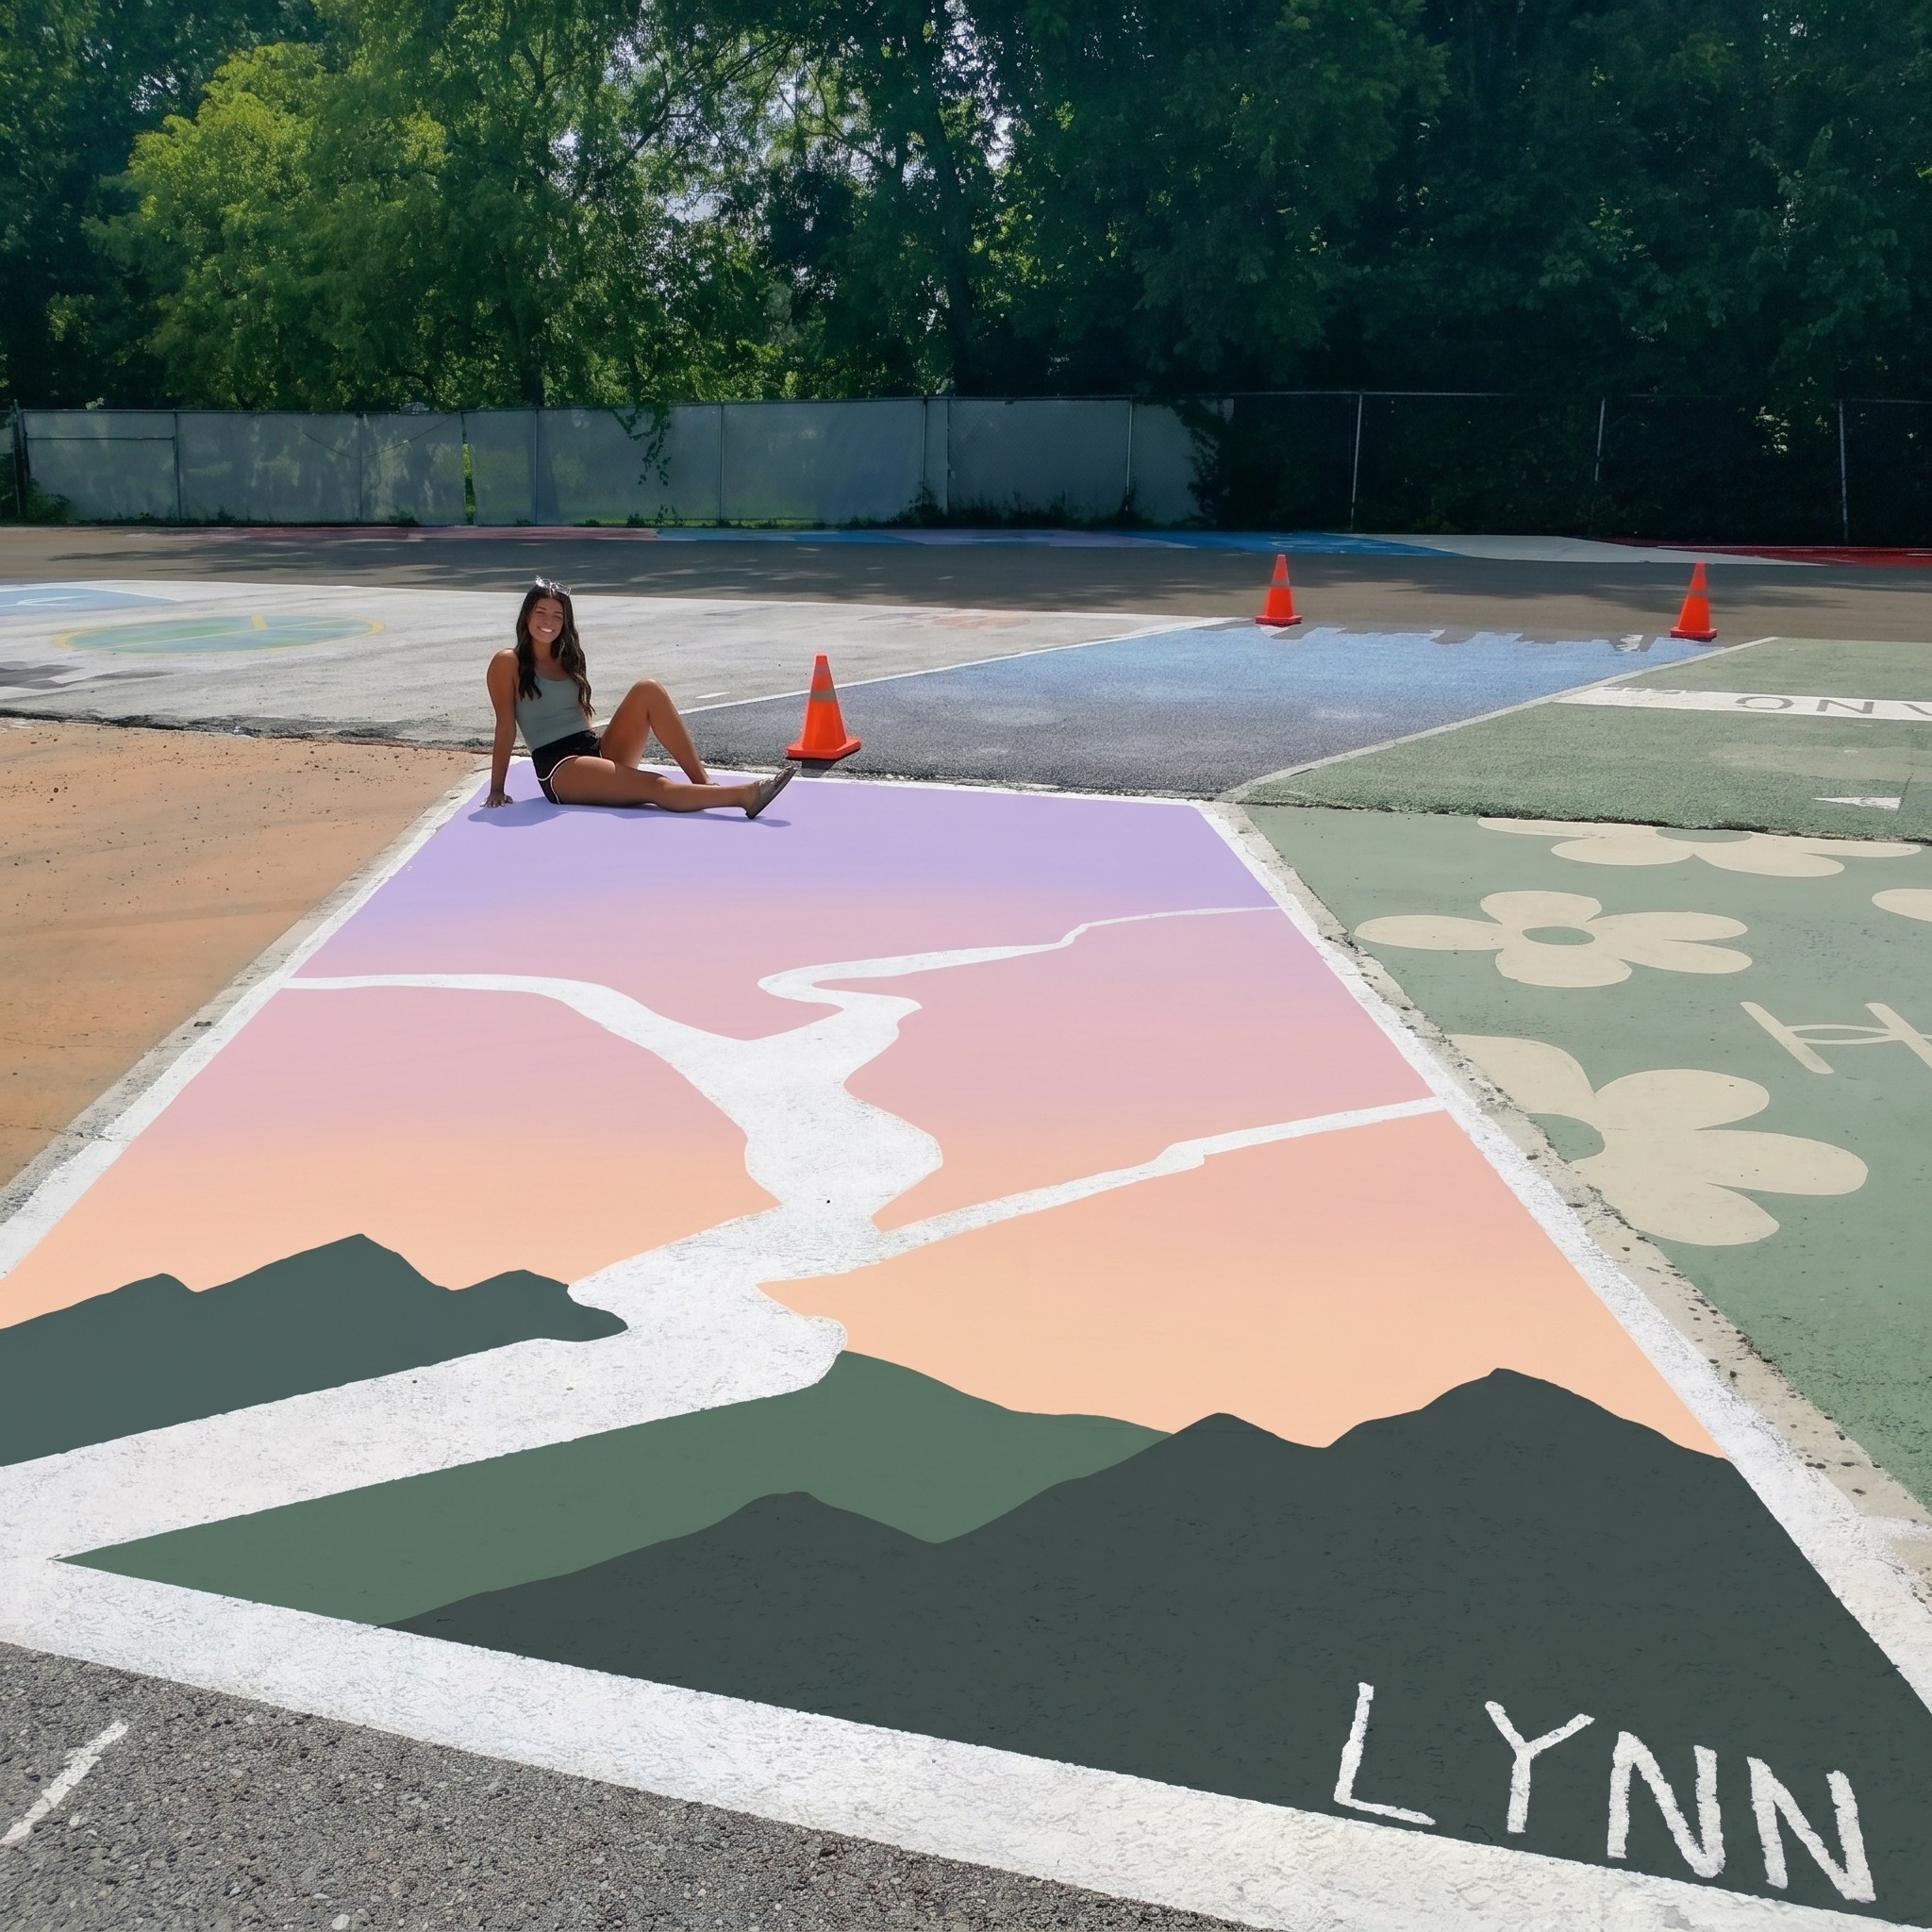
9. Minimalist Mountain Silhouette
A simple outline of mountains across the bottom half of your spot with a gradient sky above it. Sounds artistic, but the mountains are just a few triangles. You cut the shape out of cardboard and trace it. The tape does the rest.
Materials needed: Cardboard for mountain template, 2 paint colors (sky + mountain), foam roller, painter’s tape.
Beginner tip: Cut a simple mountain silhouette from cardboard, lay it on the asphalt, and trace it with chalk. Tape off the sky portion, paint it first, then paint the mountains after it dries.
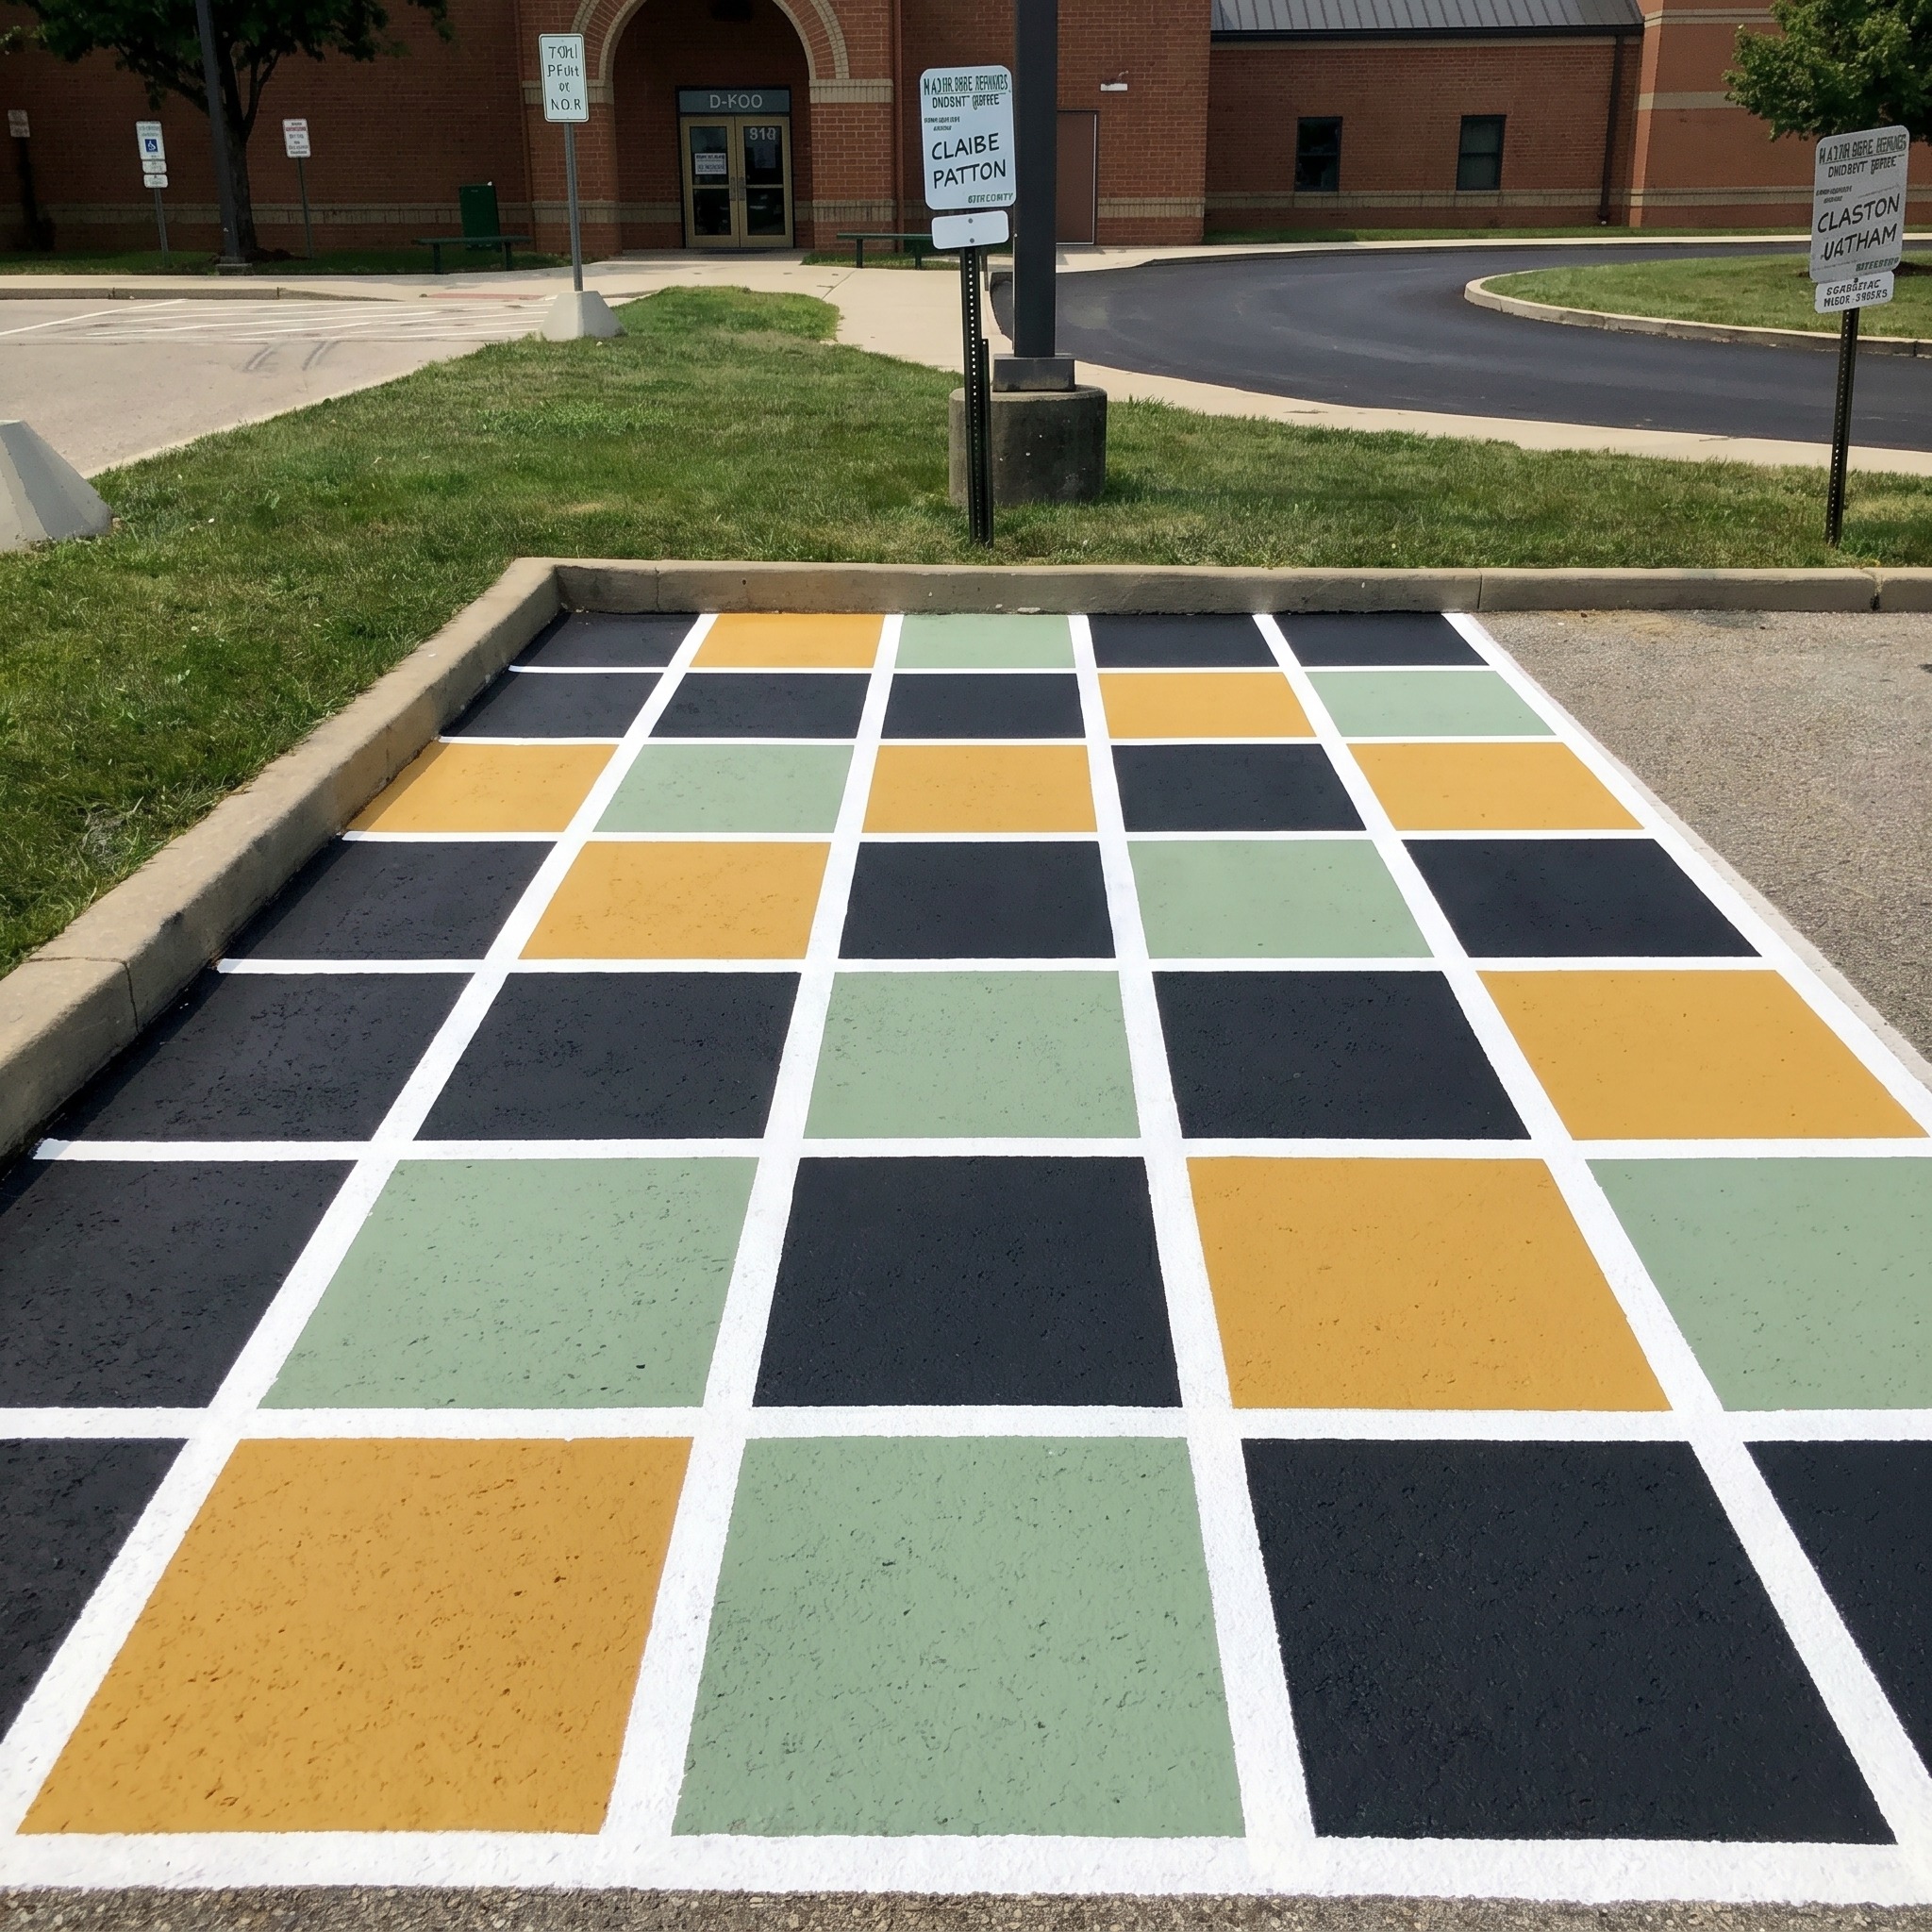
10. Color Block Quadrants
Divide your spot into four equal squares with painter’s tape and paint each one a different color. It’s one of the easiest ways to create a standout aesthetic senior parking spot. Four colors, four squares, four rolls of the foam roller, and the result is bold, colorful, and totally Instagram-worthy.
Materials needed: Painter’s tape, 4 coordinating exterior paint colors, foam roller.
Beginner tip: Choose colors that are in the same family (like four shades of blue, or four earthy tones) for a cohesive look. Wildly contrasting colors can work too. Just commit to the vibe before you start.
11. Wave Pattern
A series of flowing horizontal waves in two colors gives your aesthetic senior parking spot a relaxed, coastal energy. Waves are easier than they look because slightly wobbly lines actually make them look more natural and give your aesthetic senior parking spot that effortless, laid-back feel.
Materials needed: Painter’s tape (applied in a wavy curve), 2 exterior paint colors, foam roller.
Beginner tip: Lay your tape in a loose S-curve across the center of the spot. Don’t overthink it. Slightly imperfect curves look like real waves. Paint the top half one color, the bottom another.
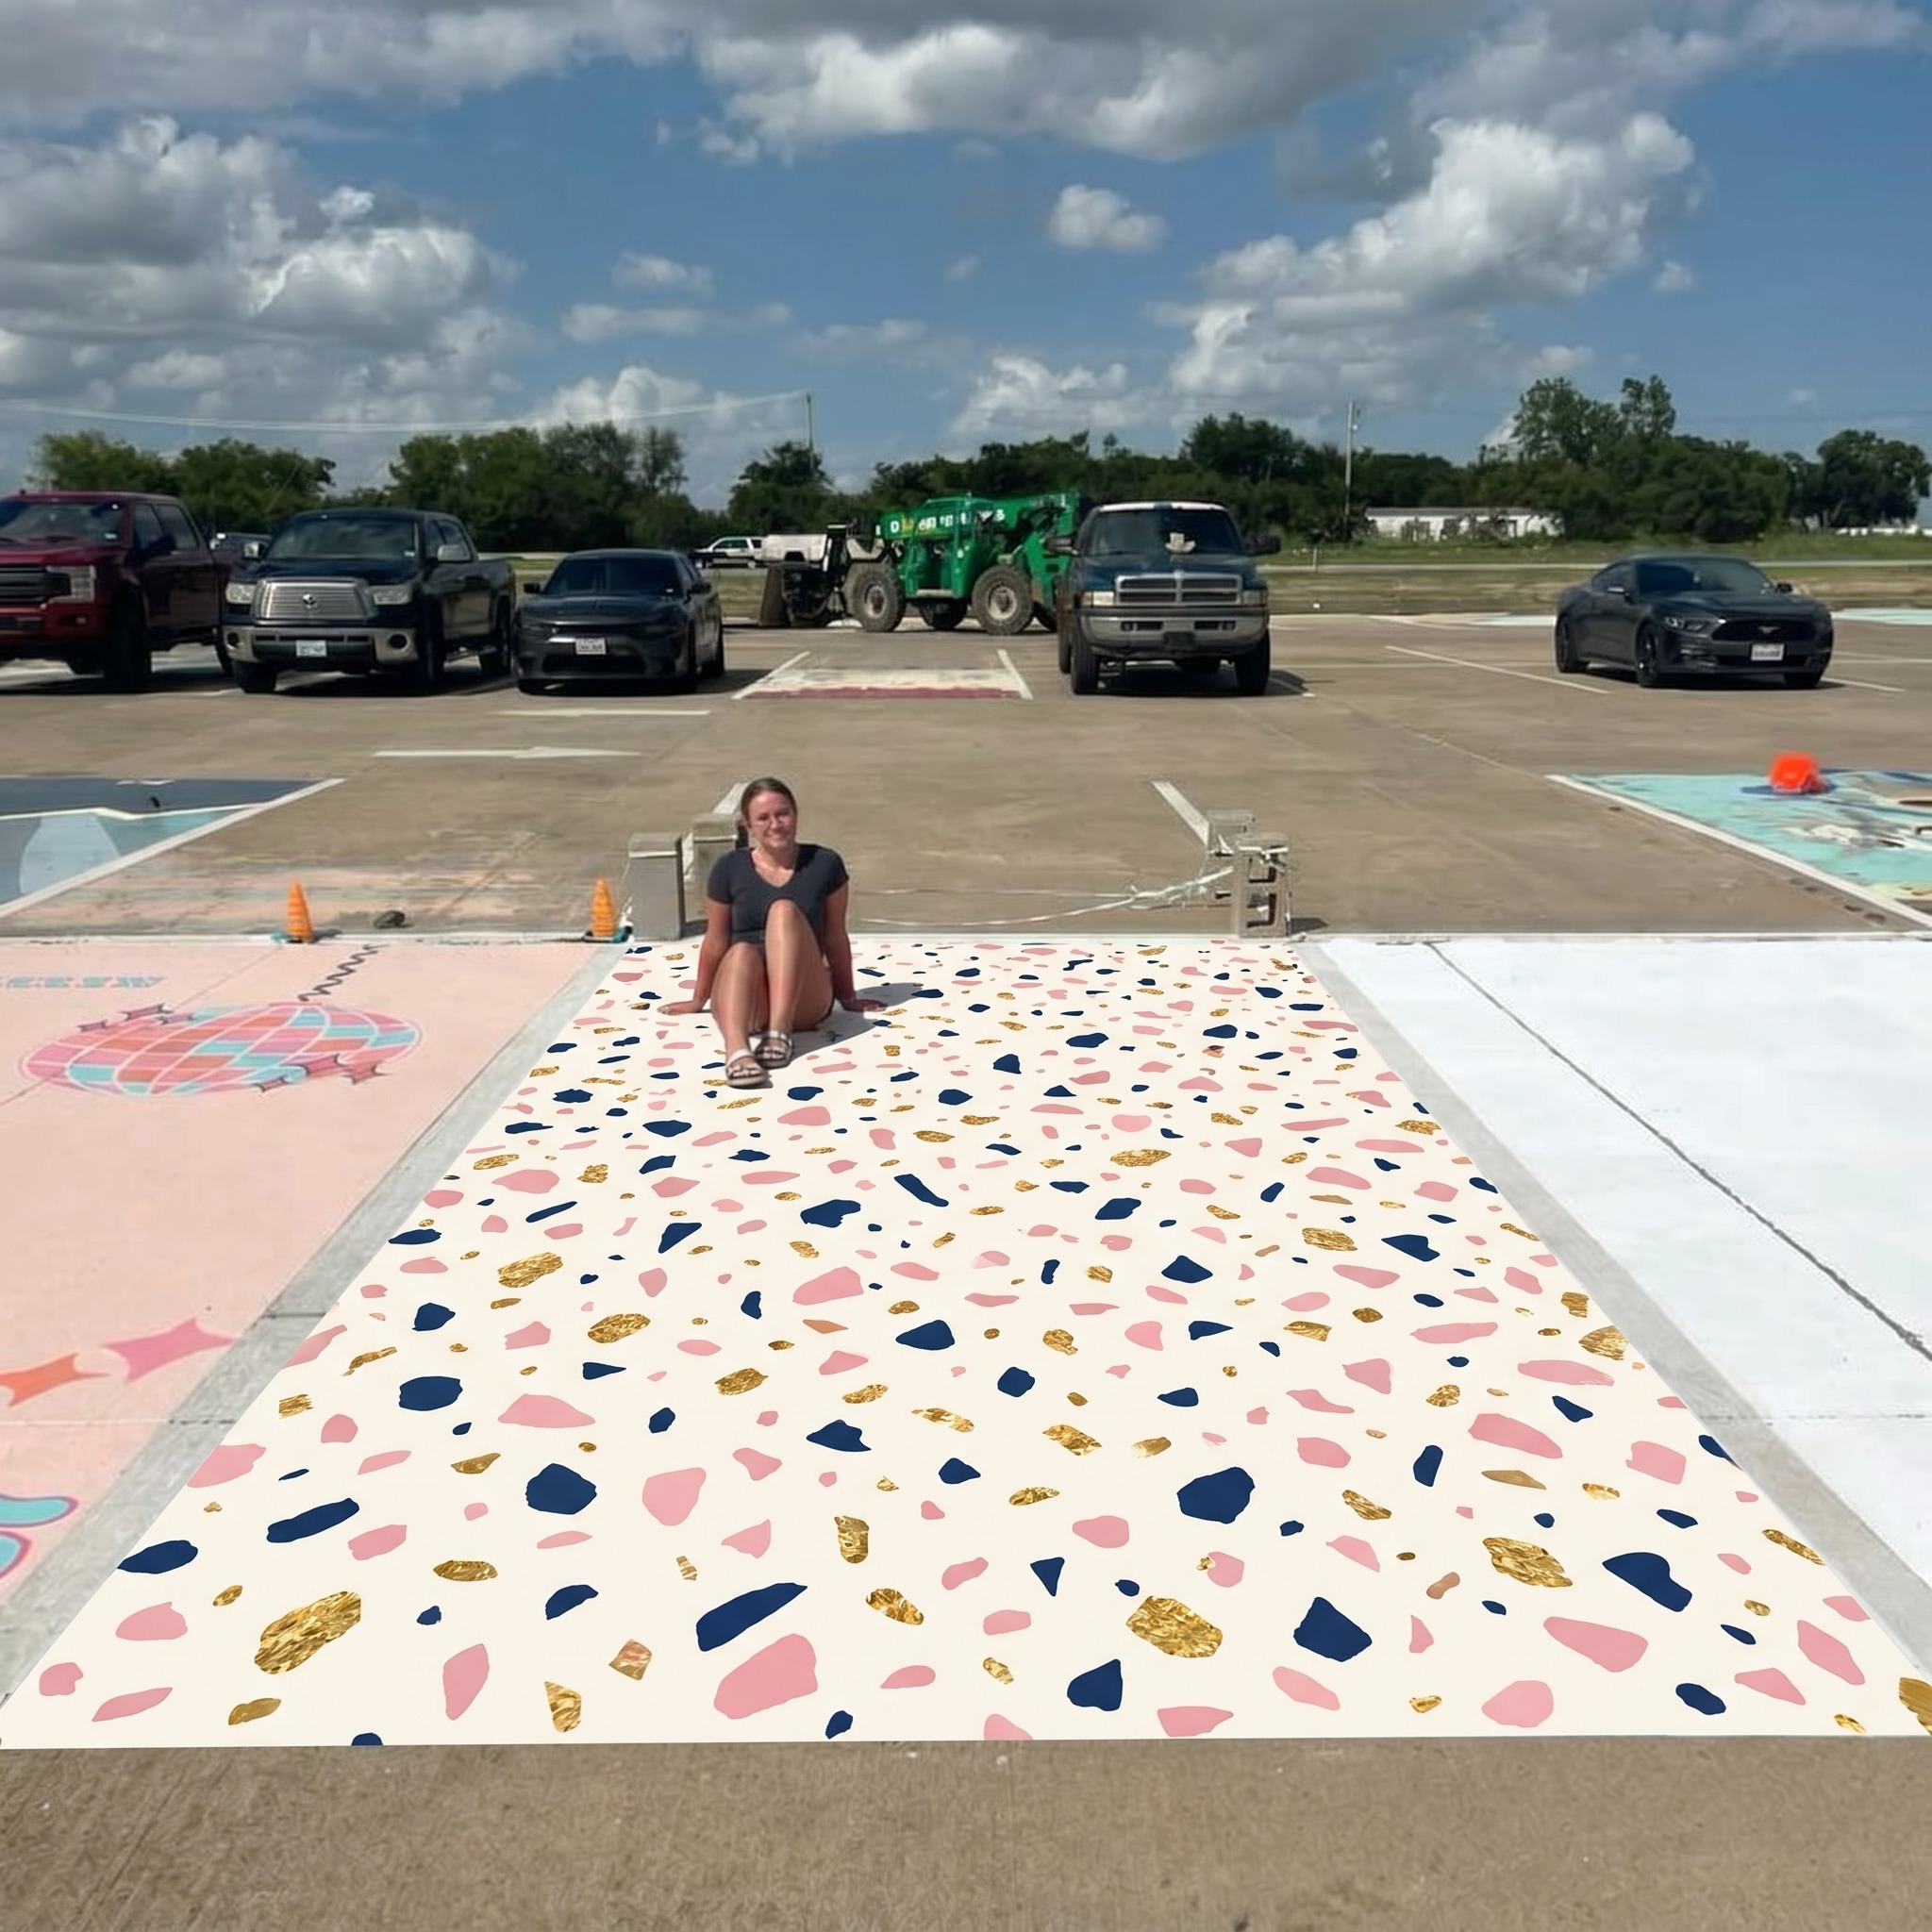
12. Terrazzo Inspired Confetti
Terrazzo is that speckled stone pattern you see on fancy floors, and recreating it makes for one of the trendiest aesthetic senior parking spot ideas on this list. Paint a solid base color, then flick a few drops of contrasting colors randomly across it. It looks high-fashion without any skill required.
Materials needed: 1 base coat exterior paint, 2–3 accent colors, small paintbrush for flicking, foam roller.
Beginner tip: Load a small paintbrush with accent paint and run your thumb across the bristles to flick tiny specks onto the dry base coat. Practice the motion on cardboard first to control the spatter size.
Before You Paint: A Note on Design + School Rules
Before finalizing your aesthetic senior parking spot design, always check your school’s guidelines. Most schools have approved color lists, size limits, and a set painting weekend. Skipping this step risks having your work painted over, so confirm everything with the activities office before buying a single can of paint.
Once approved, plan to seal your finished aesthetic senior parking spot with a clear outdoor floor sealant after the paint fully dries. One can from any hardware store costs under $15 and makes the difference between a design that looks great all year and one that fades by November.
How to Make Your Design Last All Year Long
Protecting your aesthetic senior parking spot after painting is just as important as the design itself. Always apply at least two thin coats of paint instead of one thick one. Thin coats bond better to asphalt, resist cracking in temperature changes, and dry more evenly across the whole spot.
Once the final coat is dry, apply one to two layers of clear outdoor sealant and let it cure for 24 hours before cars drive over it. If you spot chips or fading around the three-month mark, a quick touch-up with leftover paint keeps your aesthetic senior parking spot looking sharp all the way to graduation day. Every aesthetic senior parking spot that holds up through spring started with this exact step.
Final Thoughts: Simple Is Beautiful, and You’ve Got This
Your aesthetic senior parking spot doesn’t need to be a masterpiece to turn heads. It just needs to be yours. Whether you go for bold color blocks, a serene wave pattern, or a cheerful checkerboard, you’re creating something that marks your moment. Senior year only happens once, and your aesthetic senior parking spot is a small but meaningful piece of that legacy. The tape does the hard work. The simple designs do the heavy lifting on style.
So grab your supplies, bring a friend, and make that asphalt something worth photographing. Every idea in this guide was chosen because it works for real people who don’t call themselves artists, and it will work for you too. Your aesthetic senior parking spot is waiting. Go make it unforgettable.